Inquiry – Seeing the Light
So one of the first projects in the Arduino kit list is building a light sensor.
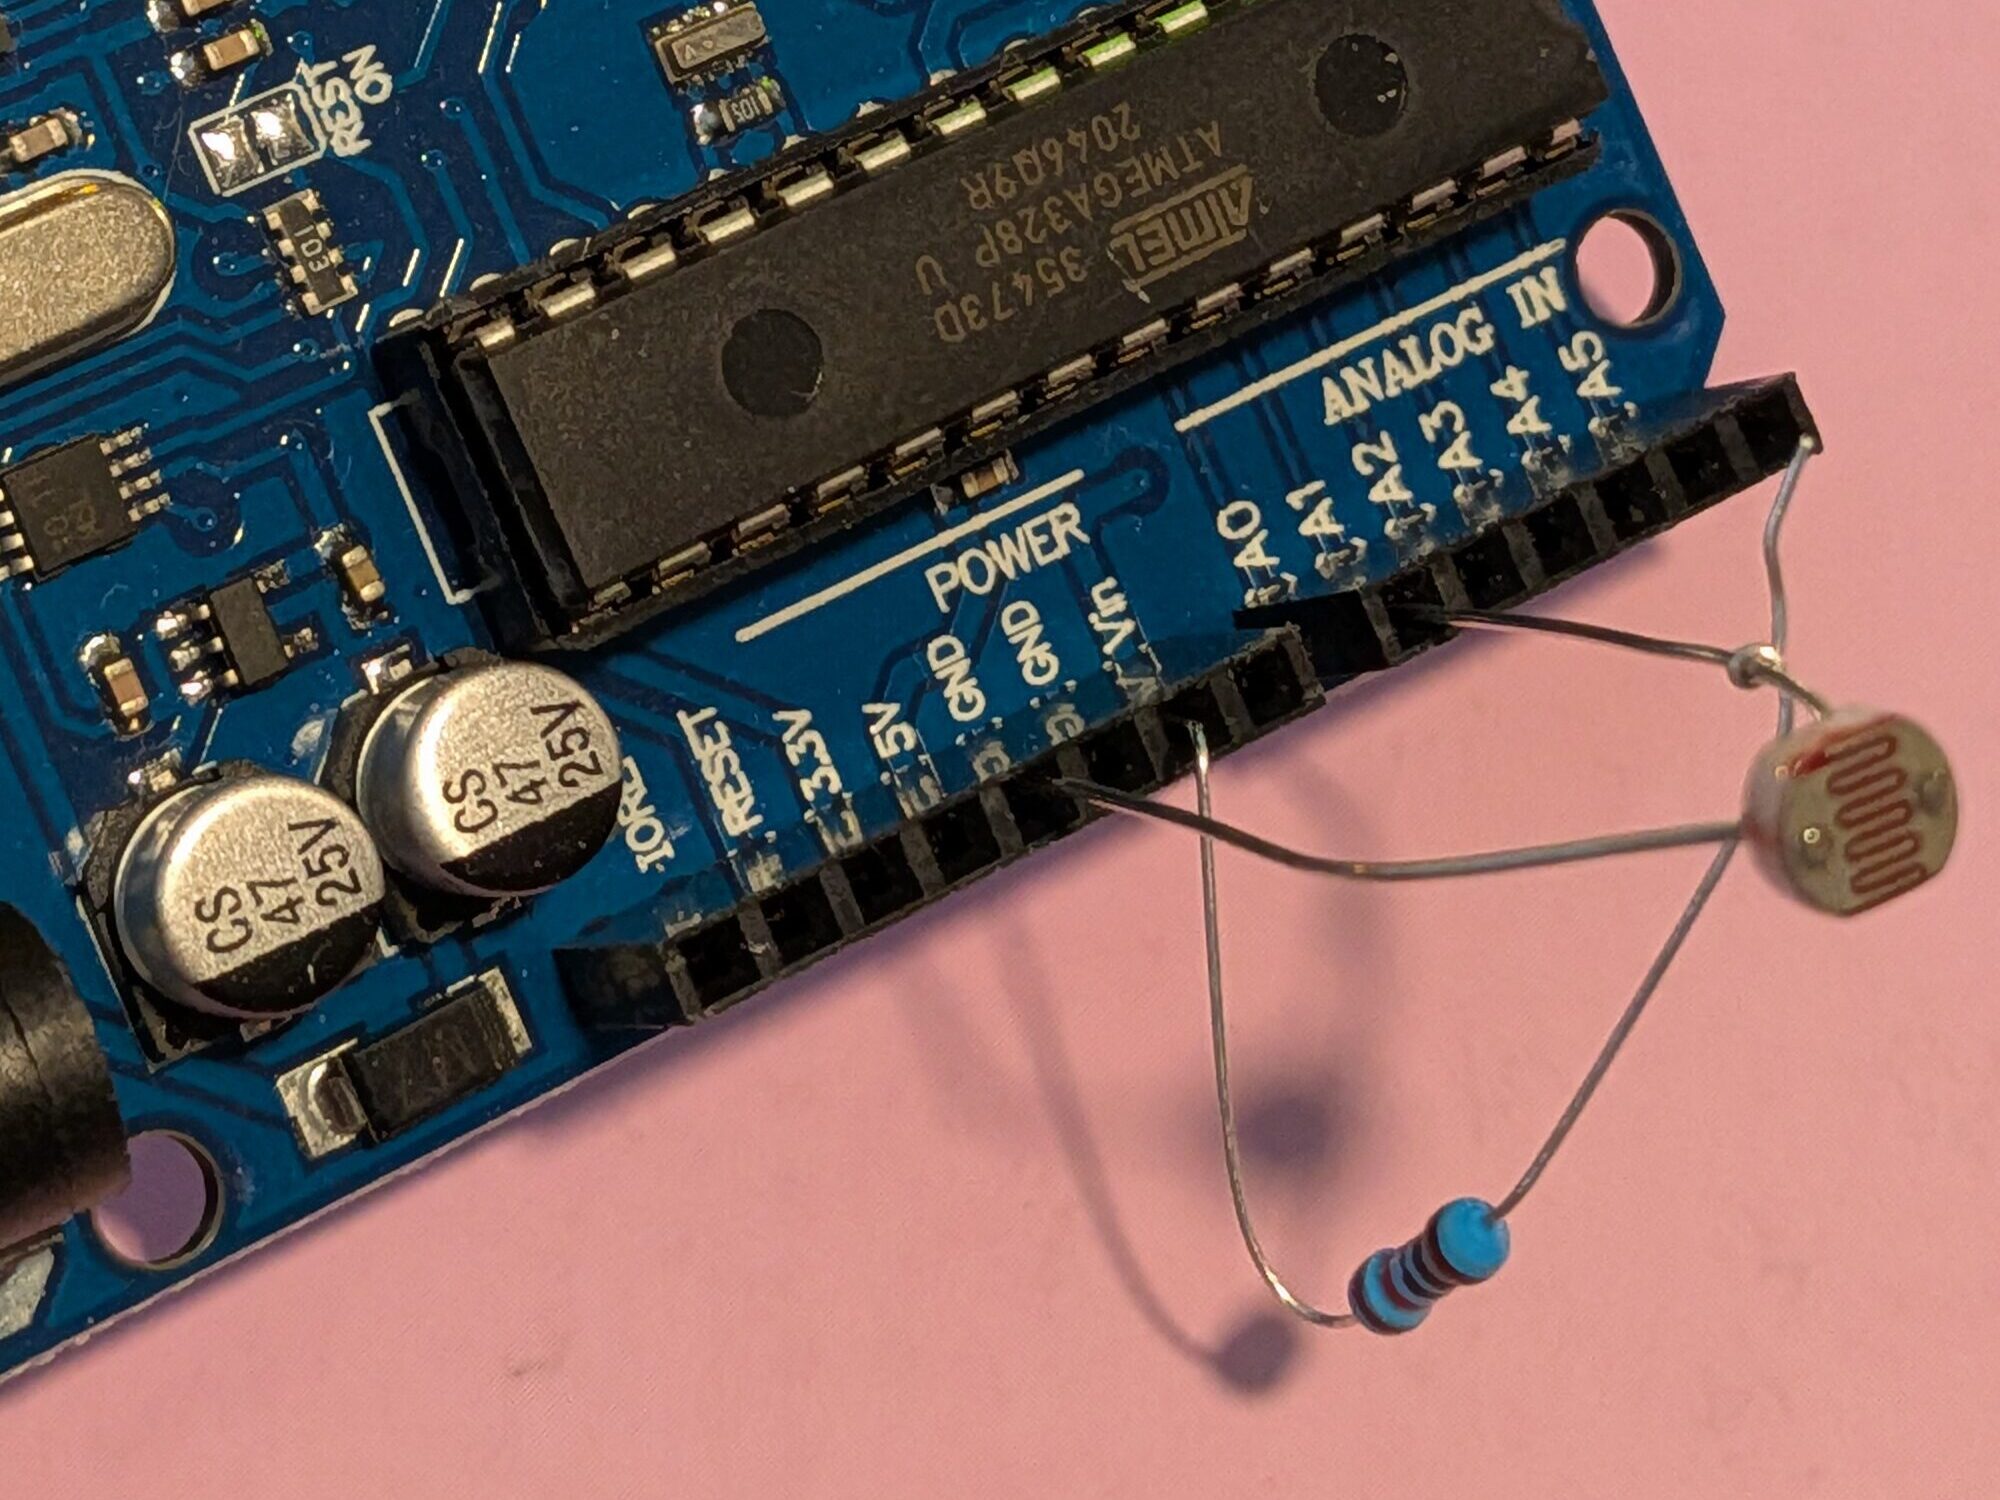
The kit comes with a variety of Sensors (which convert aspects of physical world into electronic impulses the Arduino can receive and then be interpreted by the loaded programming) and Actuators (which receive electrical impulses sent from the programming through the Arduino board and react to the electrical impulse with physical reactions like lighting up, moving, or making sound). This project uses a Light Dependent Resistor sensor and the LED built onto the board
Physical Setup
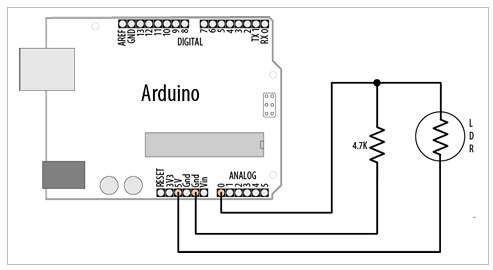
For physical set up, the instruction guide provides a diagram of the component layout.
These parts required are:
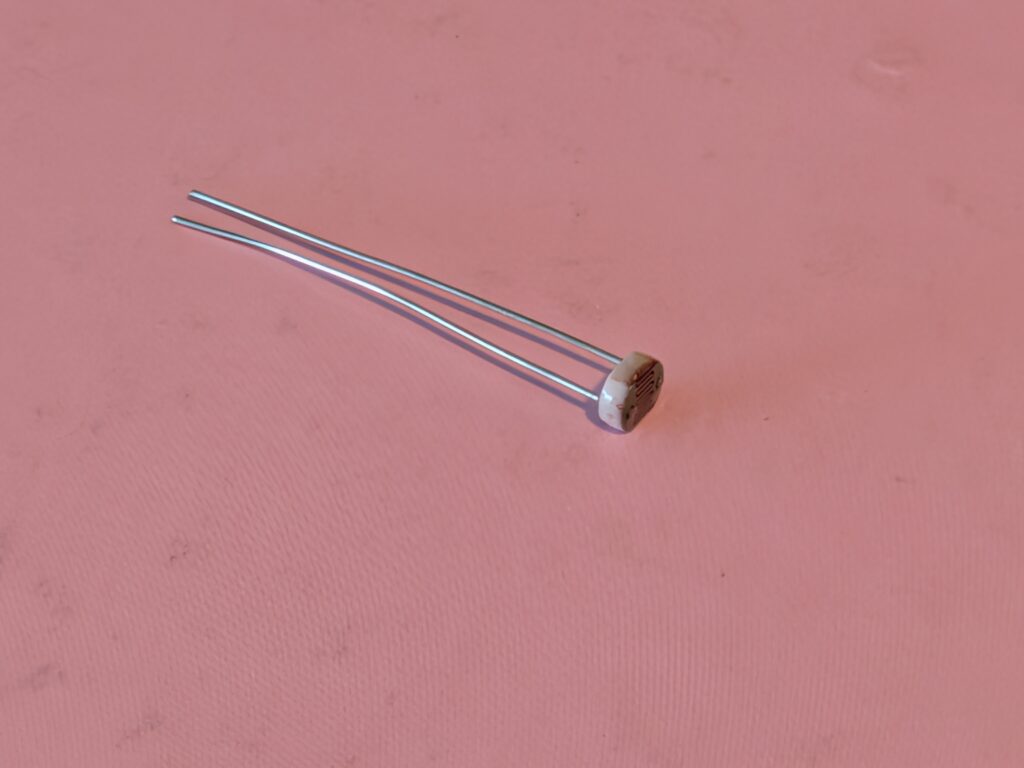
1) Light Dependent Resistor (LDR)
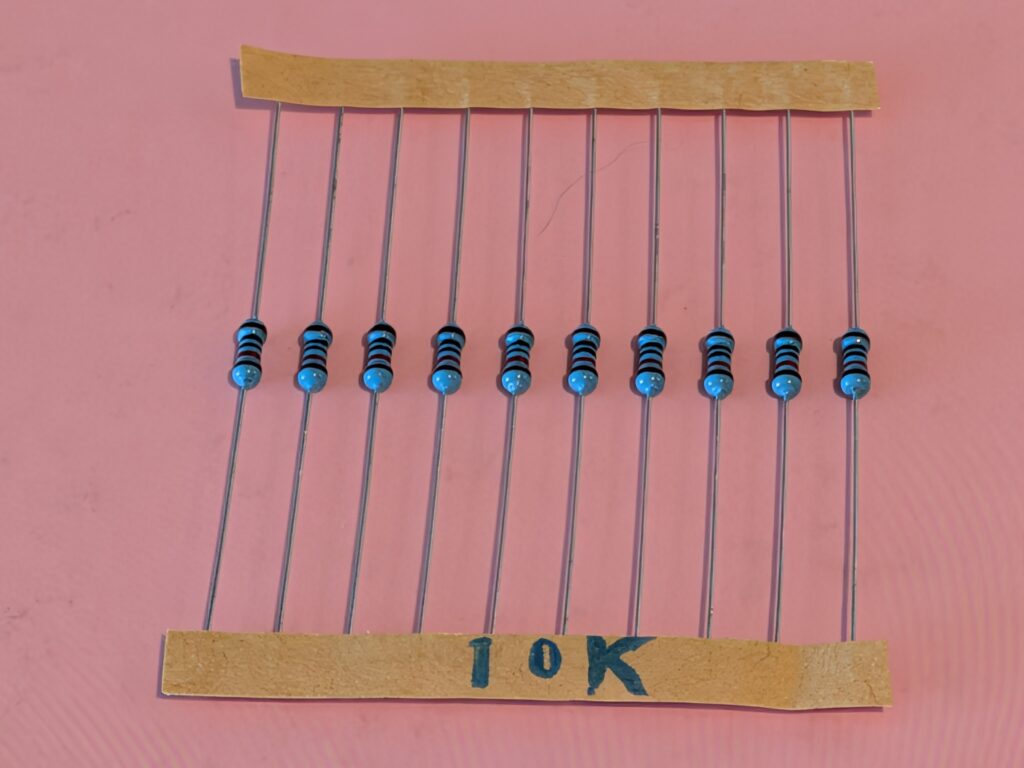
2) 10k Resistor (the diagram indicates a 4.7k but allows for up to 20k so I used a 10k)
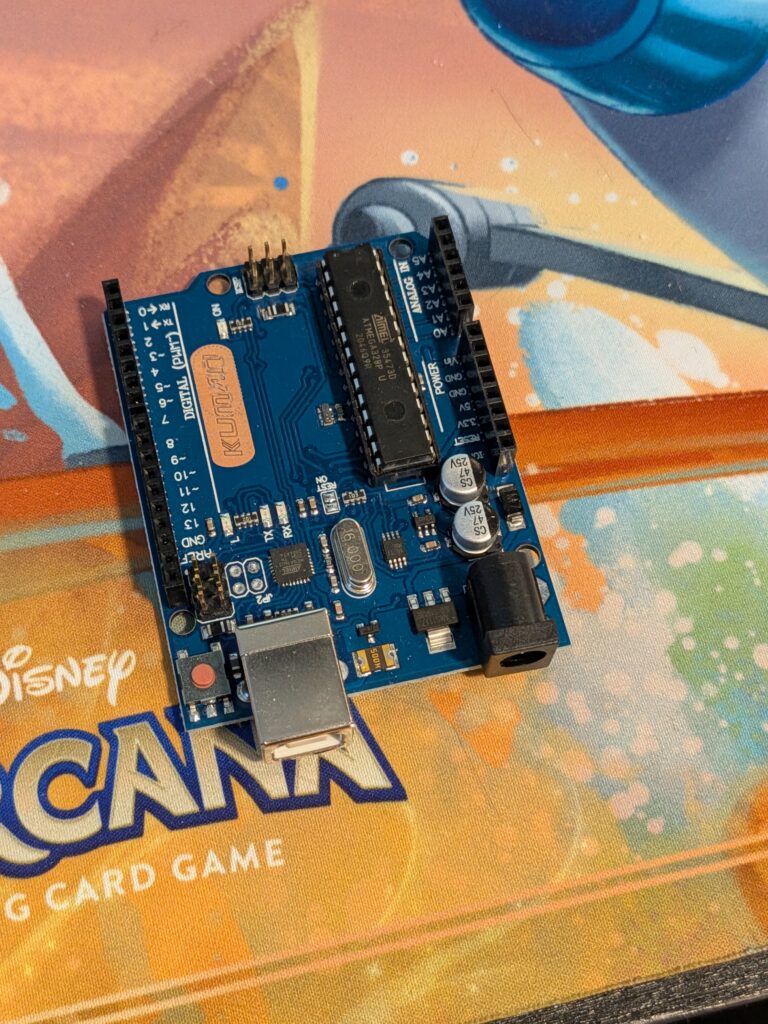
3) Arduino Uno board
I attempted to connect everything as per the diagram but it was all far too finicky.
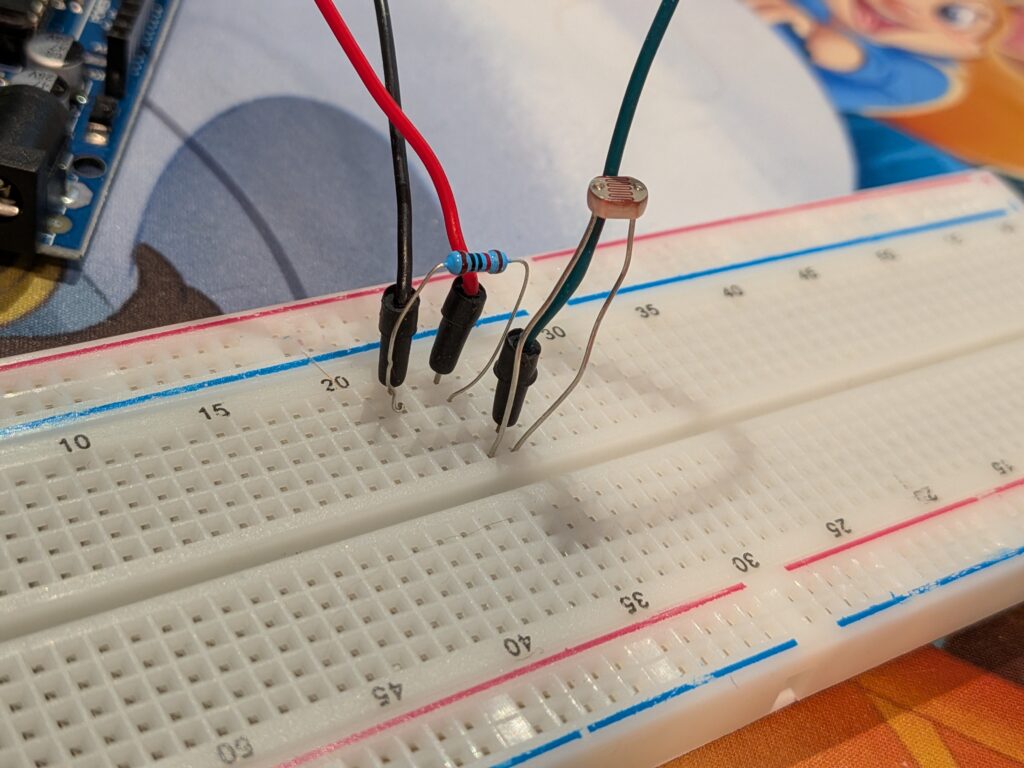
After I considered hunting down some soldering tools, my partner walked me through setting up the breadboard that came with the kit. A breadboard allows you to more easily test and move around components. We were able to set up the LDR and resistor in a configuration that matches the provided diagram but with some extra wires.
Software Setup
The Sketch (the software program developed in the Arduino IDE) provided in the instruction guide was a little misleading and I had to Frankenstein a few different sections until the IDE stopped giving me errors
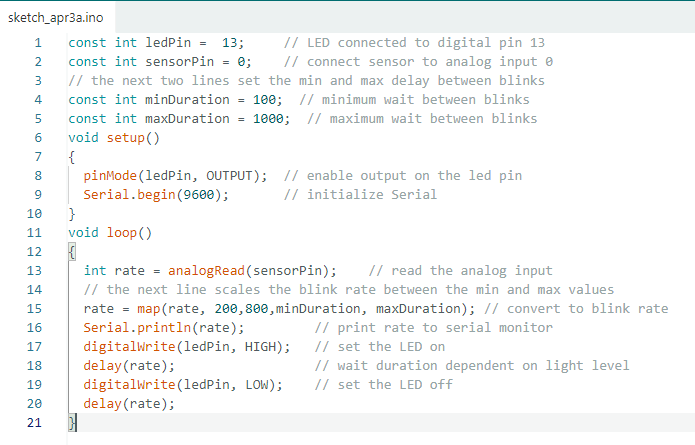
It would seem that the tutorials in this kit expect you to have a prior knowledge of programming. I have a bit of a background in coding (Python, HTML, and Microsoft Power Platform) so I kind of understand what each of these lines mean, but if I want to make changes I need to figure out the IDE lexicon. There does seem to be a lot of this kind of information scattered throughout the instruction guides but I have definitely found it helpful to have what little experience I have.
All Together Now
With everything ready to go, I plugged my Arduino into my computer with its USB cable and uploaded the sketch. Miracle of miracles it worked!
The Serial Monitor built into the IDE reads and prints out the amount of light being read through the LDR. The LED on the Arduino board flashes faster as less light is read by the LDR.
SUCCESS!!
All photos by Christa Mitchell under CC BY-NC-ND 4.0